Tuesday, 14 December 2010

flash website


The first step for creating a flash website is to open the action script 2.0 select the rectangle shape and draw on the stage. After that make four layers and name them action, buttons, content and background. After this make key frames at 10, 20, 30 and at 40. On the buttons layer remove all frames. On the background layer create the button name in-between the layer frames.


The second part is to delete all the frames in the buttons layer. Once this is done you can make the layout of the other pages and change the colours. To do this just copy the background then edit and paste in place on each of the layers. Once you have done this select a different colour for each of these backgrounds.


Wednesday, 8 December 2010

Evaluation

Evaluation

For this unit I was asked to produce an interactive comic using adobe flash. My original ideas for the comic was to have a fight sequence between two characters I created on paper, I also made a story board and choreography for the comic. But shortly after I had to get rid of the idea because it was very time consuming. My new idea was from a short video that I made in the summer. It is a fight scene between me and a friend of mine.

I made the comic by taking print screens of the scenes that I want to use and turn them into a stop/start animation, after I had the scenes I wanted I saved them as jpg files and opened them in Photoshop cropped them, used the film grain filter and then reduced the hue and saturation on everything except the shorts I had on. The next part was to import them to flash and put the images in order on the timeline and for how long I want the scene to be shown for. The next part of is to add speech bubbles and tweens, my comic doesn’t really have a story line so there isn’t that much dialog  and I was rushed for time so there aren’t as many tweens I would like but ii feel that comic still fore fills its purpose

The things I would change in my comic is the start button and background, I should have made it in flash not Photoshop because you can see the pixels. And I also want to change the position of the button it’s self and centralise it.

If I had to do this unit again I would stick to a really simple idea and keep it, also I would try and get as much of the animation side of the comic done at the beginning and not leave it to the last minute .
I thought this was a good project but I feel I could have done better with more time so the comic didn’t look rushed.

comic style

Monday, 22 November 2010

speech bubble demo

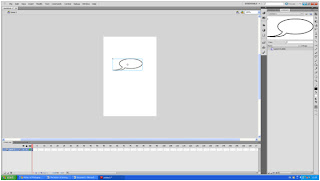
Today I did a demo on how to make speech bubbles using flash. The first step is selecting the oval tool and draw an oval on the canvas with a black outline and a white fill.


 The next step to the speech bubble is to add the tail. I did this by selecting the pen tool drawing one line off of the side of the oval and drawing another line connecting them together. 


Then i got rid of the line in-between the tail flick by clicking on large gap size and no fill.
The third step is and text and make it into a video. This is done by selecting the text tool click in the middle of the bubble and type the word them press F8 and save as bubble. If u want adjust the flick of the bubble you can do this by selecting the move tool and hover over the flick until a right angle comes up and then just click and drag.

Sunday, 7 November 2010

zoom

This is a zoom shot of an image of a high street using flash. The first thing I did was to open the image in Photoshop and change the size of the image height to 900 and the resolution to 72.  


The second thing I did was to import it in to flash by going on file, import and import to stage. Once I had the image I added rulers and scaled the image down the size I want. Then I went on the timeline and hid the image, and then I selected 50 on the timeline, right clicked and selected create classic tween. Then i stretched the image and positioned the clock in the centre.


After, I pressed ctrl enter to see the image zoom in and out in a separate window.


add more on button later.

Monday, 1 November 2010

zoom and pan

This is a zoom shot of an image of a high street using flash. The first thing i did was to open the image in Photoshop and change the size of the image height to 900 and the resolution to 72.  


The second thing I did was to import it in to flash by going on file, import and import to stage. Once I had the image I added rulers and scaled the image down the size I want. Then I went on the timeline and hid the image, and then I selected 50 on the timeline, right clicked and selected create classic tween. Then i stretched the image and positioned the clock in the centre.


After i pressed ctrl enter to see the image zoom in and out in a separate window.It is the same process to make a pan shot.

Tuesday, 19 October 2010

Creation of flash flie for iPhone

Explain creation of flash file for iphone state size of image

The first thing I did was to get any image of the internet, so I chose a picture of a Honda cbf and open it in Photoshop. Once I did that I had to crop the image down to the size of an iphone screen 920 – 480. Then I opened adobe illustrator and imported the image. 
Placed a jpg on layer 1 frame 1
The second thing I did was to make a new layer in flash and add a circle on the new layer. Then I was able to move the circle around the image by making it move every five frames on the time line. I did this by clicking on the circle and dragging it where I want, and then I right clicked and make the path.


How you created a shape on layer 2
The next thing I did was to make a second layer and draw a new shape on the circle. On the demo that Marnie showed the class how to two eyes blinking when the circle moves on the chosen path. We did this by making a new layer, selecting the pen tool and drawing whatever image you want and then make it a tween. I didn’t get round to doing this because i fell behind during the demo.

Saturday, 16 October 2010

3 methods of capture

I went to astor playing feild to capture graffiti in three different ways, one digital and two non-digital.I chose photography, memory and writng. I took around twenty four images of different parts of the whole wall. Then I need to put these images in to a poster of the park in a unique way. I still need to get round to doing the two non-digital capture methods.

interactive comics

This is some of my research i have done for interactive comics. The first one is an interactive comic called Hotel which is very random and weird in my opinion but at the same time very interactive. Almost every character is interactive. My opinion of this comic is that it has too much going on at once and I cant understand the story line, this comic just doesnt grab my atention.
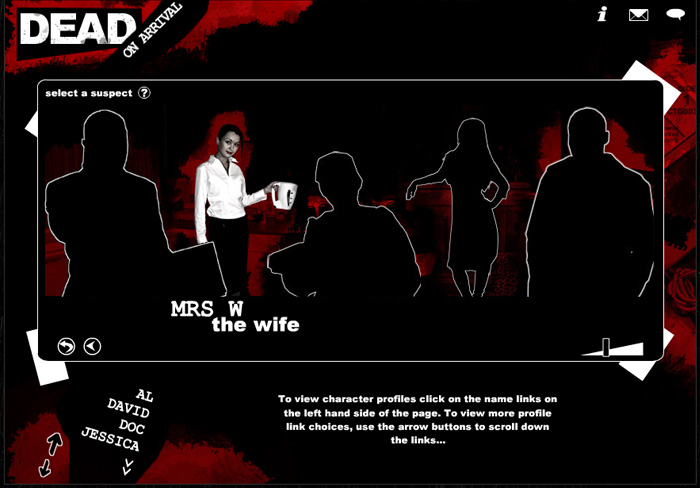
The second comic i found and researched is a comic called Dead on Arrival which is a much better interactive comic in my eyes because it grabs your attention straight away and i feel that this is more of a comic that Hotel because of the layout and the way that there is more than one story line. You can also choose what character you want to follow. There are no video moments or cutscenes but there are different effects such as zoom, fade, cel shade and pan shots.